 The Task At Hand
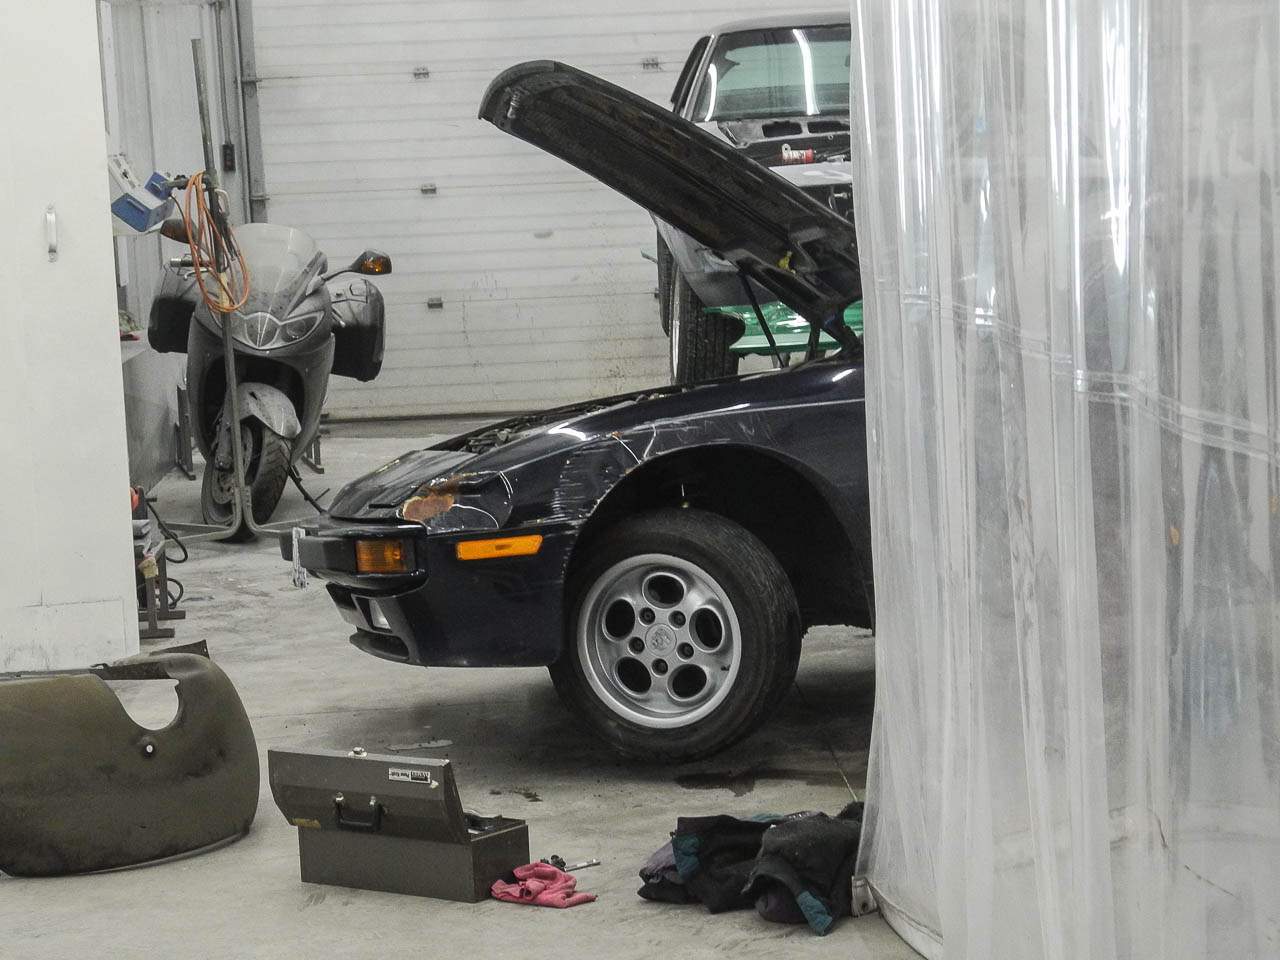
Finally, after a number of hour or two-long sporadic sessions over quite a few months, we are ready to fit a repaired and primed driver side fender.
Background
Backing up a bit, the plan is to maximize driving opportunities and minimize downtime during the period of needed bodywork. Thus, my approach is to wrestle each deficient body component or area to the ground at a time, prepping and then going to the level of weather-worthy primer. Someday (!) we will be ready for the complete paint job.
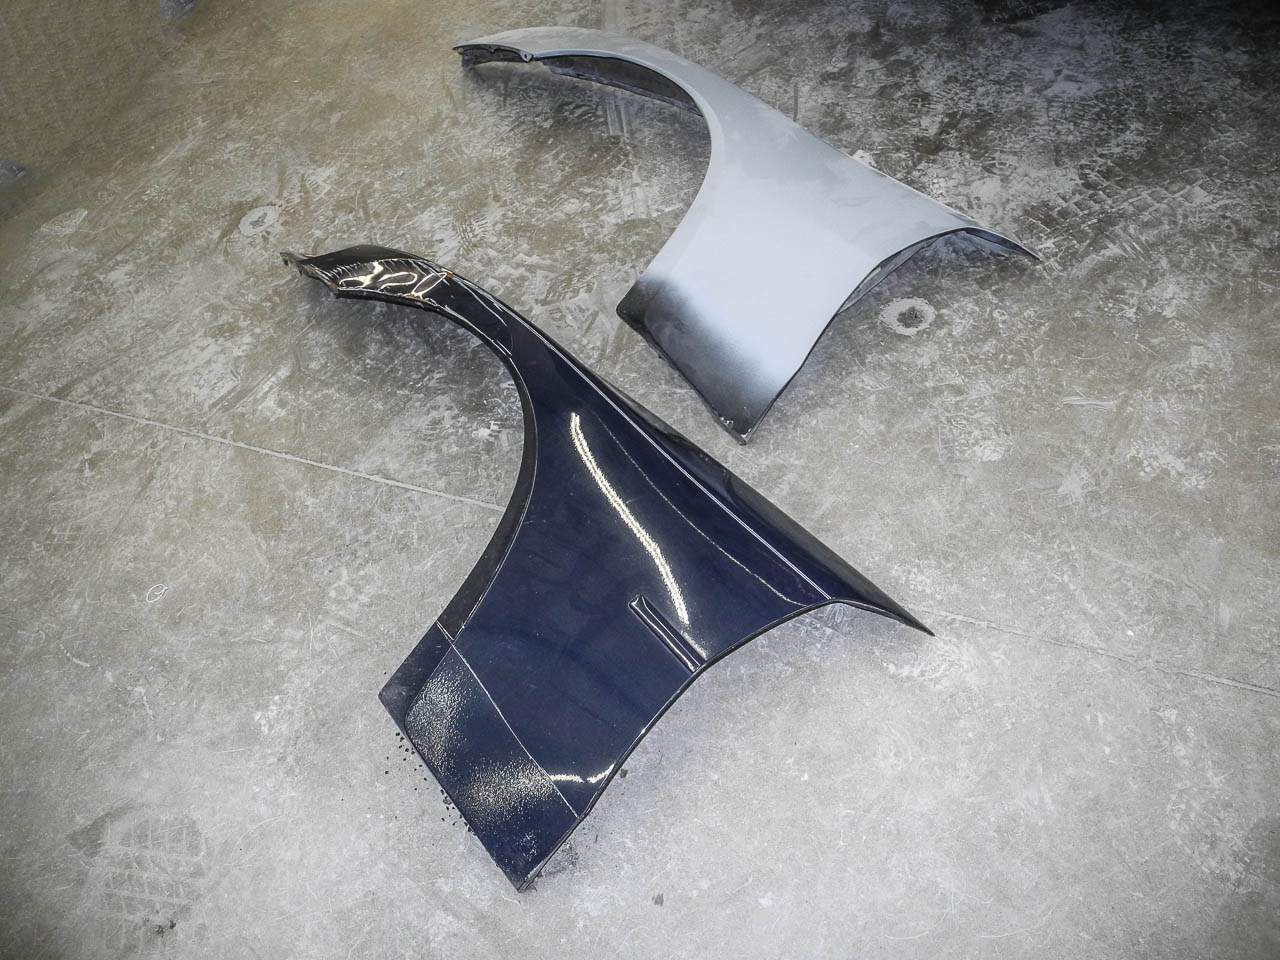
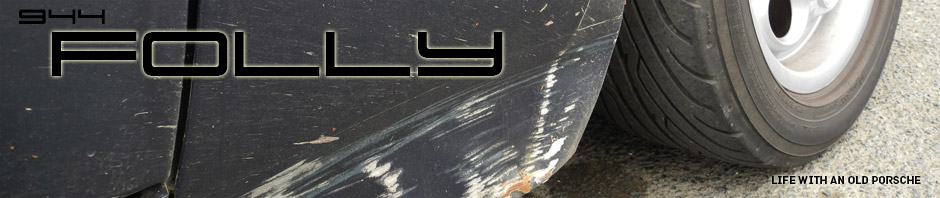
Starting with the most aggregious body wound — the dinged front corner (hit while parked, presumably by a truck, during the tenure of the PO [previous owner]) — I found a fairly decent, straight, non-filler-laden fender after weeks of scouring wrecking yards, eBay and Craigslist, then proceeded to sand, smooth, and groom the thing as a replacement. A number of previous posts over the past fall and winter have featured some of the activity in the run-up to today’s milestone mini-epic.
Not included here — but maybe I can assemble them in PDF form or at least provide a list of URLs — were the dozens of forum threads, particularly from the wonderful Pelican Parts forum, but also from Rennlist, 944 Online and many others, on the topic of fender removal and replacement. All of them contributed in some degree to our understanding going in, but none of them fully prepared us for what was actually to take place. What I never found was a good video document of the process, so we may try to orchestrate something like that for the next round on the passenger side fender.
Executive Summary
Eric, in a show of his ever-present positivity, told us that it shouldn’t be a big deal. After all, the shop estimator software showed something like 2.5, or was it 2.8, hours to accomplish the R & R procedure. Well … in the first place, Dennis and I had never done one of these, and we didn’t realize the extent to which the damage to the original would complicate matters. Let me make it clear right now that nothing would have been accomplished without the enormous effort put forth by my artist friend, Dennis. Truth be told, aside from an occasional steadying hand, a tool proffer, some unintelligible muttering and the like (I do recall inserting a screwdriver down a narrow gap to wedge against an unreachable nut at one point), my role was really that of documentarian.
About six hours later, the replacement fender was in place. To be fair, some of the time was consumed with the tricky matter of readjusting the headlight housing position, as it appeared that the impact of the original collision had knocked the headlight supports and bracketing slightly askew (and that had even led the PO to remove the plastic headlight surround to allow clearance for opening/closing the flip-up light, and this in turn had made that driver-side beam impossible to aim properly). But most of the “extra” time was in wrestling and grappling with the bolts and nuts that had been obscured by the ding and/or distortion of inner fender brackets. Not to mention that many of the bolts were hidden beneath thick undercoating and may have never been discovered without the replacement fender for reference as it was waiting in the wings.
The Dirty Details
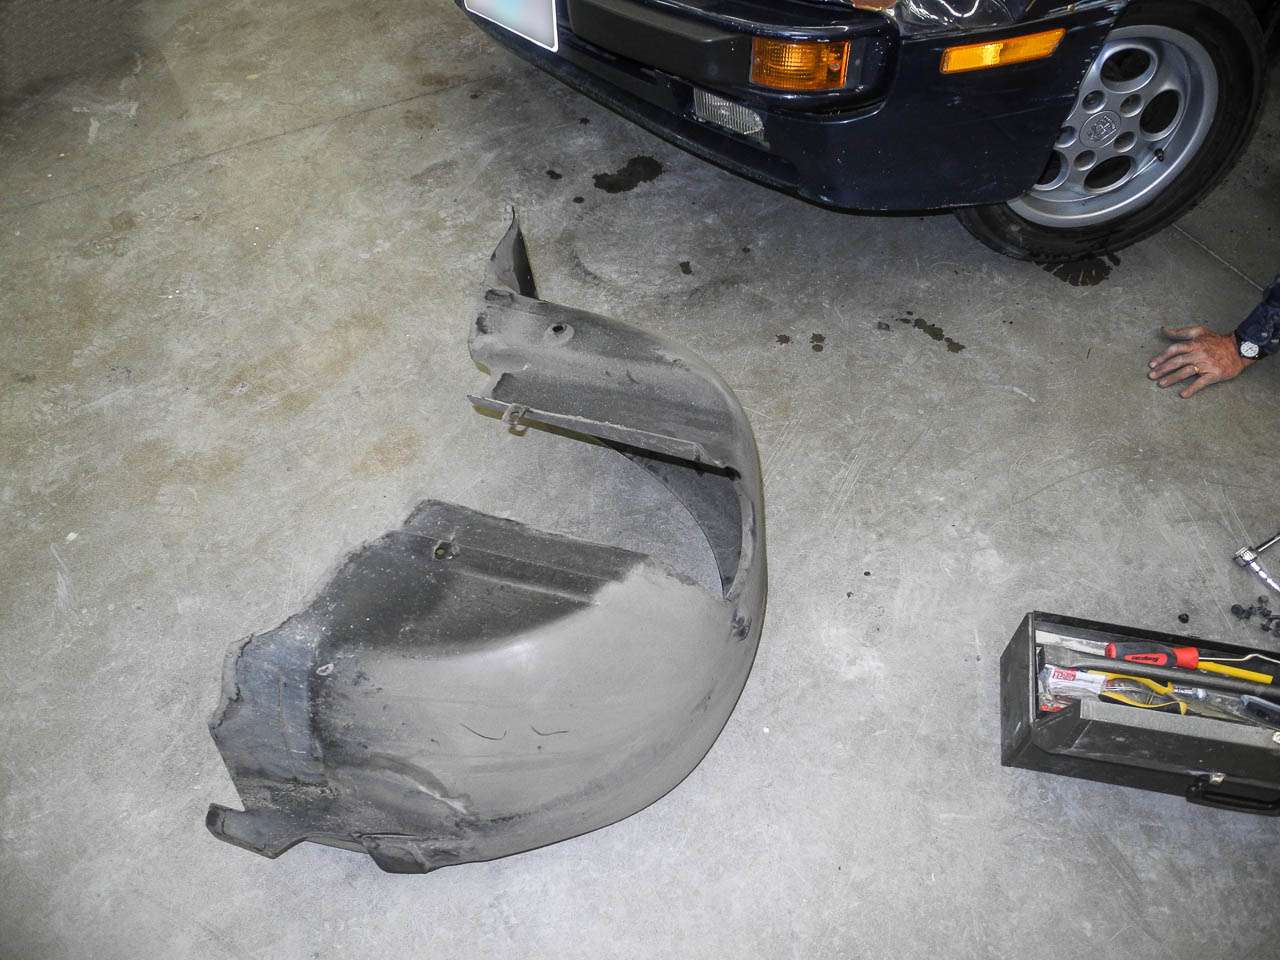
After we got the left side of the car on jack stands, the first step was to remove the inner fender liner. The next time we do this, by the way, we might first remove the tire & wheel, as it was not the cakewalk we may have been expecting. Then we set to removing — I lost count, maybe twenty — bolts that actually attached the fender, working from the bottom up. Actually, we thought we had completed this step when we discovered a ridiculously-angled and obscure bolt at the very front inside tip of the fender, of course, hidden from view, let alone access, by the ding damage.
Once we had identified and removed all retaining/restraining bolts, we found that the fender refused to budge. Upon closer inspection a couple of layers of sealer seemed to be involved, and was holding firm. Carefully driving a putty knife into the puttied seam, along the length under the top flange of the fender, gradually released the thing. Once the fender was off, we had exposed more of the headlight assembly and could turn our attention to fixing that bugaboo through a series of minute back-and-forth adjustments. Then we re-attached the long-removed headlight surround, and made final up/down headlight switching tests until we were satisfied with the operation and with the symmetry of both headlight flap positions and gaps.
A couple of slight snags occurred during the remounting of the replacement fender. First, we discovered that the replacement fender was actually missing a couple of subtle brackets that were on the original. Of course, we didn’t know that the replacement was technically incomplete until the old fender was removed and could be inspected. Amateurs we are. Second, we found that we had to straighten some mounting brackets on the inside surface before the new fender holes would align properly.
Epilogue
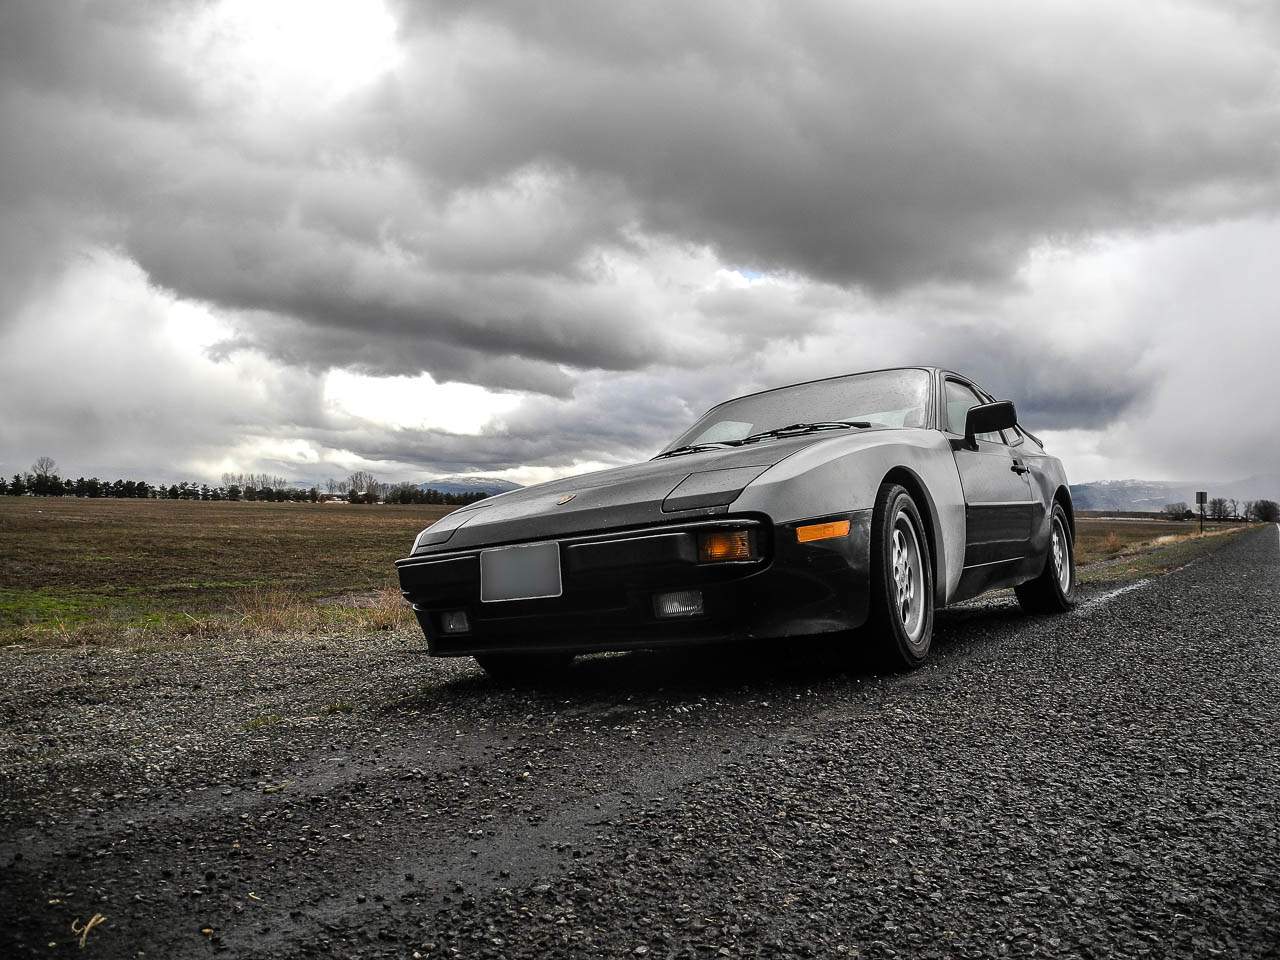
But once all was in place and fastened down, the spectacle was glorious indeed, in all of its gray-primer splendor. I fully expect that the smoother surface will generate enhanced airflow, surely resulting in significant gains in top speed and fuel mileage. Well, maybe not.
Next up: replacing the passenger side fender, which should go much, much faster due to our new-found experience and the fact that its major damage only appears at a more accessible rear-bottom and rocker panel level.